Tuesday, February 4, 2014

Silk Painting

Now for something completely different...
Silk Painting

This summer I decided on a "bus man's holiday" and tried a completely new medium, silk painting.  According to many sources it is said that the history of silk begins in China during the 27th century BCE. Light, strong and soft silk was an immediately successful commodity.  One of the oldest surviving examples of silk painting depicts a dragon and is from the Mawangdui Tomb dating from the 16th century BCE.


Silk painting with resist technique emerges fully in the 2nd century AD India and is then carried to Western Europe by the Crusades during the 12th century AD. At the same time, silk painting was spreading east to Java and Indonesia.  

I am by no means an expert, but here is my journey getting started with silk painting.  I hope it is a trip you enjoy too!:
Silk painting begins with a sketch drawing that is refined into a clean line drawing.  Think "coloring book" drawing because that is essentially what you need to do is create discrete areas for color.
To prepare your painting surface you stretch silk fabric on a clean painting stretcher.  I highly recommend you review in line resources like those provided by supplies like Dharma Trading Company and review You Tube demonstrations.  Just type in silk painting and you will find a wealth of information.

The next step is to transfer your sketch on to the stretched silk itself.   You can draw your design on with a disappearing ink marker, similar to those used by quilters, or you can draw directly on the silk with the resist called gutta.  I like to place my drawing directly under the silk as a guide.  The silk is transparent enough that I see it.  It does take practice to gain a steady hand so I recommend that when you get started use the marker.  I still use the marker for detailed work that needs careful alignments.

You may be wondering what is gutta anyway? Well, it is a rubber base liquid resist.  You buy it in large quantities and then transfer it to a small bottle with a drawing tip, similar to a pastry chef when icing a cake.  Gutta comes in several different kinds and colors.  They all have different requirements and tradeoffs so best to consider all this before you get started.  Here I decided to use a black gutta and a water soluble gutta.  The black gutta will leave permanent black lines while the soluble gutta will wash out leaving a white line of the undyed silk.


If you look carefully you can see in the next image the addition of the flowers in the water soluble gutta "under" the moths.  I like using the different guttas in order to enhance the illusion of foreground, middle ground and background.


Here is the first application of dye.  I tried to dye the largest areas first and then move into the smaller areas.


Here is the final piece off the stretcher, dye set, washed and dried. Note that there is some loss of color intensity with washing and drying.  I have found that I can compensate for that by redying areas. 


Prepared Drawing Surfaces

Tired of the same old drawing surface?
Try Stained and Coated Drawing Surfaces


Problems Keeping a Sketchbook?

Are You Having Problems Keeping a Sketchbook?


One of the most difficult disciplines to maintain as an artist once you leave school is keeping a regular sketchbook.  Yet, there is nothing more essential to keeping your mind open, your skills honed, and your creativity flowing than the unrestricted and safe space of a personal sketchbook.

Here are just two recommendations:
1.  Get a sketchbook buddy. You've heard of gym buddies, coffee clutches and diet partners, well why not a friend who will be supportive, shares your love of drawing and painting, and help keep you focused on what is really important to you...Your Art!

Here is my sketchbook buddy!  We meet for 30 minutes to an hour once a week to draw.


2. Try the Sketchbook project:
Check out mine:
http://www.sketchbookproject.com/users/mecarsleyart/artwork


By the way, it was my sketchbook buddy, Kourtney, who got me to participate!


Here's where to sign up:
http://www.sketchbookproject.com/

Hope that is some help!  Be sure to share your work with our little blog community!

Upcoming Field Sketching Trip

Mark Your Calendar to Get Rid of Those Winter Dulldrums!
Saturday, March 22nd, 2014
The Carsley Art Studio will be hosting a field sketching trip to
 The National Zoo Washington, D.C.


Meet us under the big Animal Clock at 10am for a day of animal drawing instruction.
Stay as long as you like. We recommend taking metro and a brown bag lunch.
Check this blog for any changes in plan due to inclement weather.

Master Drawing Copy Exercise

Master Drawing Copy Exercise

Many of our students have asked about drawing exercises that build confidence with measuring, proportion, as well as in approaching the human figure.  One of the best exercises for this is copying a master drawing.  Please see the instruction sheet below.  As always, if you have any questions feel free to comment or email us.  We are always happy to provide on line feedback!


In light of this exercise, you may want to consider a terrific addition to your art library:
Drawing Lessons from the Great Masters by Robert Beverly Hale
ISBN 0-8230-1401-0

Monday, February 3, 2014

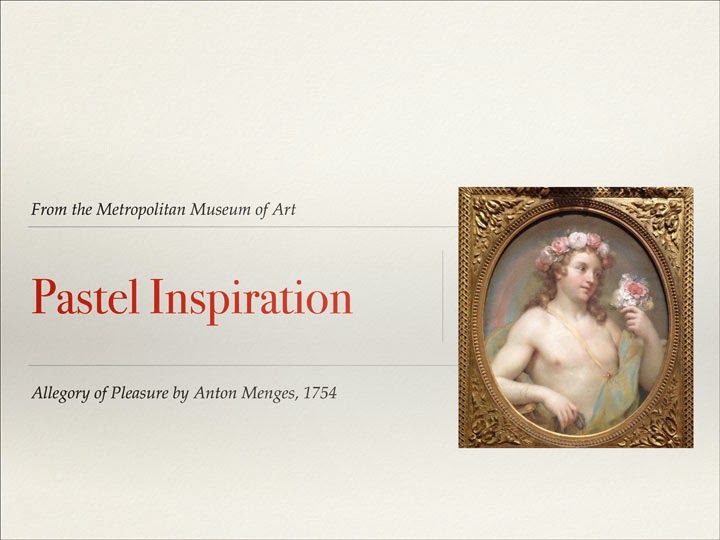
Getting Started with Pastels


Below are some beautiful examples that can lend some historic perspective
regarding the medium of chalk pastel from a 2013 exhibit
at the Metropolitan Museum of Art in New York


Wednesday, March 27, 2013

Sketching while on Travel


Creating and Maintaining a Travel Sketchbook

One of the most rewarding parts of travel can be marrying it with the creative process through a travel sketch book.  Here are a few tips on how to start and maintain a travel sketch book:

First, consider your schedule and destination in considering your media, techniques and equipment.  All too seldom do artistic travelers have the opportunity to linger upon a single subject as much as they would like.  Be sure to have a small, light weight, digital camera (I find my IPad perfect for this) in order to quickly document what you see first or on the fly, thereby creating a visual reference file for yourself for use at a more convenient time.

Be realistic about time and schedule a private sketch time for yourself everyday when you can return to a subject or work from your photo references to finish up a quick plien air start.  Be realistic too about the amount of time you can spend on a single work and keep your works small and your media and techniques simple.  Save the large works and media experiments for your studio at home!

Find a sturdy, easy to use container for your media that fits conveniently into what ever tote you will be carrying daily with you as you tour.  I am quite fond of the one pictured   here.  (Please note the six inch clear plastic ruler in the picture for scale). It is compact, lightweight, and sturdy protecting the contents from any impacts.  It closes securely with a zipper and has tight elastic to secure pencils and brushes.


I prefer a hard bound sketchbook.  I find that spiral bindings can become bent and caught on things.  The hard binding also provides a convenient drawing surface.  The paper I use is usually for both wet and dry media.

The sketchbook here was for my recent trip to Italy.  You may note that it is a landscape format.  I purposely chose that as I knew I wanted to do some landscape sketches.  Be sure to consider the proportions of your sketch book with regard to your anticipated subject matter.

Be sure to pack media that needs a minimum of space, creates a minimum of mess and light weight equipment so you have maximum flexibility as to where and when you can work (I love to finish drawings on the plane).  Also, no one wants to lug an easel up and down mountain sides or through crowded city streets unless you intend to stay awhile or stay close by.  


Staples my travel sketch kit includes: permanent ink drawing pens (similar to the Micron brand) as well as a small assortment of hard and soft leaded pencils.  Don't forget the sharpener, kneaded eraser, small ruler as well as a stump and tortillion or two for blending.  Sometimes I like to bring conte pencils which work well for landscape and architectural subjects. but, make sure your sharpener can accommodate the larger conte barrel.  Leave the pen knives and x acto knives at home as airport security will confiscate them.  Another good addition are wash pencils which can be used as traditional sketching pencils or you can add water and achieve a wash effect.


With regards to wet media, I include several types in my kit.  The first are watercolor pencils that behave like normal colored pencils when dry and then can melt into soft washes with the addition of water.  I prefer the Derwent watercolor colored pencils and like to use the watercolor brushes that have the hollow handle as the water container for achieving the wash technique.  I also carry a small, preloaded, plastic folding palette for my traditional watercolors.  I do not bother with tubes as the per loaded, dry palette will have more than enough paint for a two week trip.  For use with this palette, I carry three small brushes, two flats and one detail.

And that is really it. Here are a few examples of sketches created from the media kit described above.  Please note that I find many of these mediums combine well.

The sketch of the olives is a combination of pencil and watercolor:
  

This sketch is a simple watercolor monochrome.


 This sketch combines watercolor and ink.


This sketch began as a colored pencil sketch and then I added water.